
Frame Serving in Depth
This document discusses Microplex frame server:
Compatibility Issues
Network Protocols
The Microplex frame servers use World Wide Web and Internet technology
to display captured images. Therefore, TCP/IP is the network protocol used
to communicate with it. This could involve any of these network stations:
-
Unix hosts,
-
PCs and Macs running third party TCP software (i.e. stacks),
-
PCs running Windows NT, Windows 95, or Windows for Workgroups.
As long as a network station can access the Internet and World Wide Web
pages, it can be used with the NetworkEye frame servers.
Web Browsers
The frame servers are optimized to work with Netscape version 2.02 and
higher. This ensures the best image viewing. However, the NetworkEye-Colour
requires Java support as well at the minimum.
Digital Cameras
Currently the Microplex frame servers support the Connectix QuickCam for
Windows cameras only including both the black and white (with the NetworkEye
model) and colour (with the NetworkEye-Colour model) camera models.
Architecture and Design
Physical Design
The key parts of the NetworkEye's physical design are:
-
one RJ45 network connector to attach itself and the camera to the network,
-
a proprietary parallel interface for data transfer from the camera,
-
one power socket for the frame server's power supply,
-
one power socket for the camera to plug into,
-
flash PROM to store the firmware code and hidden configurable settings,
-
RAM to help with image and network communication processing.
NetworkEye Front View

NetworkEye Rear View

Logical Design
The Microplex frame servers are miniature Web or HTTP servers consisting
of:
-
Flash file system
A 63-kilobyte area for holding HTML documents and graphics
files.
-
HTTP server
Serves HTML documents stored on the NetworkEye to requesting
Web browsers.
-
FTP server
Allows FTP clients to connect to the NetworkEye to change,
create, copy, and delete HTML-related files stored in the device's file
system.
Configuration and Viewing
To use a Microplex NetworkEye, the basic configuration steps are:
-
Attach the NetworkEye to the network, attach the camera to the NetworkEye,
and power up the devices.
-
Configure the print server with its IP network settings so it can be seen
on the TCP/IP network.
-
Load a Web browser to view the default image page.
Attaching to the Network
These steps are necessary to attach the NetworkEye to the network:
-
Plug in the 10Base-T Ethernet cable into the NetworkEye's RJ45 connector.
-
Plug the Connectix QuickCam's keyboard power plug into the NetworkEye's
camera power socket. The camera should be plugged in to the device before
the NetworkEye is plugged in.
-
Plug in the NetworkEye's power supply and watch the power-on self test
cycle through. When this test is complete, the POWER LED should be on and
STAT should be flashing.
Configuring the NetworkEye for Use
Requirements for Use - IP address and subnet mask configured
on the frame server at the minimum, TCP/IP loaded on a station (on the
same subnet as the NetworkEye) with an IP address and subnet mask assigned
to this station, and a Web browser loaded on this station
Configuration Methods - manual "arp -s" command, RARP, and BOOTP
Suggested Setup:
Use manual "arp -s" command and a Microplex HTML configuration form
to configure the NetworkEye's IP settings and then use a Web browser to
view the default image page.
The steps to do this are:
-
On a local network station, find the "arp" executable.
-
Find the Ethernet address for the Microplex frame server on the bottom
of the device. It must be entered as part of this process.
-
Use the "arp" command to add an entry for this frame server into the station's
ARP table. This is the most common syntax:
arp -s networkeyeIPaddress networkeyeEthernetaddress
Example:
arp -s 192.1.1.1 00:80:72:05:1c:1a
-
Try to "ping" to this IP address to make sure the NetworkEye can be seen
on the network.
-
Load a Web browser onto this local station.
-
Direct the Web browser to the Uniform Resource Locator (URL) "http://networkeyeIPaddress/cgi-bin/indexConf"
(e.g. "http://192.1.1.1/cgi-bin/indexConf").
-
Once prompted for a "User ID", type "root".
-
At the password prompt, just press ENTER since there is no password stored
by default.
-
On the "Configuration" form that displays, click on "Network".
-
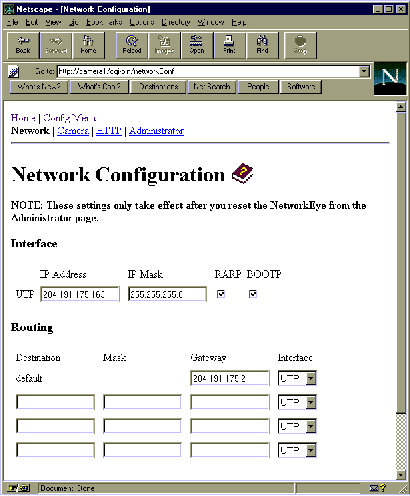
On the "Network Configuration" form that displays, click in the box below
the "IP Address" heading and type in the IP address for the NetworkEye.
NetworkEye Configuration Form

-
Click in the box below the "IP Mask" heading and type in the subnet mask
for the NetworkEye.
Note:
To communicate with the NetworkEye across routers, fill in the entry
below the "Routing" section of this form. Click in the first box under
the "Gateway" heading and type in the IP address of the default router/gateway
on the network.
-
Click on the SUBMIT button and repower the NetworkEye by unplugging and
plugging in the power supply.
At this point, the Microplex frame server has its IP settings stored in
EEPROM to be remembered after power cycles. It's now time to view images
captured by the attached digital camera. To do this, direct the Web browser
on this network station to the URL "http://networkeyeIPaddress/image.html"
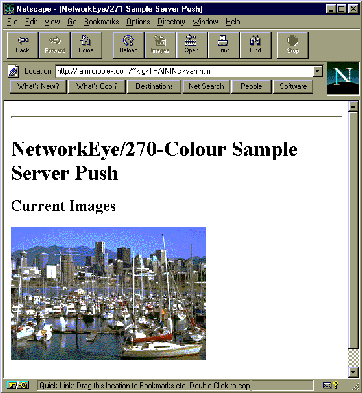
(e.g. "http://192.1.1.1/image.html"). This will bring up a sample image
page which comes with the NetworkEye by default. It will have this format
though the picture will obviously change depending on what the NetworkEye
is pointing at:
Sample Default Image Page

This particular page uses the "refresh" META tag meaning the image will
update itself every so many seconds. If this station is running Netscape
version 2.02 or higher, go to the URL "http://networkeyeIPaddress/images.html"
(e.g. "http://192.1.1.1/images.html") to see a captured image with a smoother
transition between updates. This is accomplished using Server Push rather
than the "refresh" META tag.
Microplex offers these default image pages to help get things started.
Any Web page can be used though as long as it has a place to show the captured
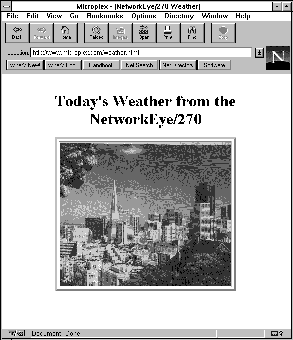
image. For example, this is a sample Web page displaying the weather in
an area monitored by a NetworkEye:
Sample Custom Image Page

Note:
Custom pages must be "put" onto the NetworkEye to be viewed since they
do not come default with the device. Using an FTP session, the new HTML
file is placed into the "http" directory on the NetworkEye so Web browsers
can access it.
Additional Features
The Microplex NetworkEye offers several options for viewing the captured
images. This flexibility allows it to adapt easily to different camera
installations. The main additional options found on these frame servers
are:
-
Default HTML Page Selection
By default, each NetworkEye comes with a set of default HTML
pages which show the image currently viewed by the attached camera. This
means a standard Web page template is provided rather than having to come
up with an image page from scratch. This makes for an easier and quicker
installation process.
-
Configuration HTML Forms with Built-in Help System
By default, the NetworkEye comes with a set of configuration
HTML forms allowing for configuration through a Web browser. By directing
the browser to a specific URL on the frame server, network, login, camera,
and image settings on the device can be easily and graphically configured.
In addition, an online help system is built right in to these configuration
forms.
-
Multiple Image Viewing Methods
The most common image viewing method with the NetworkEye is
through a Web browser. By directing the browser to a specific URL, the
captured images can be seen. However, there are times when Web browsers
won't be used. For example, maybe image frames need to be captured and
stored on a system for such purposes as surveillance or photo identification
cards. The Microplex frame servers address this by providing FTP and remote
shell command (e.g. "rsh") support to grab raw images directly from the
device as they are captured from the attached camera. These can then be
saved to files for use.
-
Free Flash Upgrades
The NetworkEye models come with flash PROM allowing for free
upgrades over TCP/IP networks. The basic steps of the upgrade process are:
-
Get the new firmware file and the supporting download file from Microplex.
-
Load these two files onto an IP station.
-
Tell the frame server to go into upgrade mode and begin the upgrade process.
-
Wait for approximately five minutes.
-
Check a default configuration HTML form to see if the firmware version
upgraded successfully.
Advantages over Competitors
The Microplex frame server family has the following advantages over current
competitors:
-
Lower cost for the same functionality
Though the Microplex NetworkEye has to be bought in conjunction
with the Connectix camera, the combined cost is still lower than any competitors
on the market. In fact, it's approximately one third the price and there's
little difference in product functionality and features.
-
Multiple methods for grabbing images through a Web browser
The Microplex frame servers provide three ways within a Web
browser to grab images captured from the attached camera:
-
Server Push for smooth, continuous images.
-
"Refresh" META tag for new images every so many seconds.
-
User intervention (i.e. click on "Reload") for updates when needed.
Competitors' products only allow images to be updated every so many seconds
using a special META tag.
-
Ability to grab raw images rather than relying on a dynamic Web browser
to view them
The Microplex frame servers allow grabbing of raw images directly
from the device rather than having to go through a Web browser each time.
Using FTP or a remote shell command (e.g. "rsh"), a frame can be brought
to a host where it can be saved to a file for use. Competitors' products
only provide Web browser viewing.
-
Default HTML Configuration Forms with built-in help system
By default, the NetworkEye comes with a set of configuration
HTML forms allowing for configuration through a Web browser. By directing
the browser to a specific URL on the frame server, network, login, camera,
and image settings on the device can be easily and graphically configured.
In addition, an online help system is built right in to these configuration
forms. With competing products, HTML forms are not used for configuration
purposes.
-
Better Built-in Security
Through TCP access lists, user passwords, and FTP login restrictions,
the NetworkEye and NetworkEye-Colour models from Microplex provide multiple
levels of security.
-
More image sizes to choose from
Microplex offers three default image sizes currently (i.e.
320x240, 160x120, and 80x60) providing greater flexibility when creating
image HTML forms. Competitors offer fewer choices.
Common Troubleshooting Tips
These are some of the most common problems reported with Microplex frame
servers. For each problem, a description is given along with steps to solve
the problem.
Frame Server Won't Talk on the Network
Sometimes the NetworkEye won't communicate over the network from the beginning
or it will suddenly stop communicating after working for a while. In these
cases, customers most often think something has gone wrong with the device
meaning an RMA is needed, but 75% of the time, the problem is related to
configuration or network problems. Therefore, the things to check when
this happens are:
-
Is the network cable going to the frame server working? Try different network
cables and locations to help narrow down the problem.
-
Has there been a change to the network recently that might affect this
frame server's communications? For example, on a TCP/IP network, a new
device added to the network could be accidentally using the same IP address
as the frame server.
-
Has there been a change to the device itself? For example, maybe the NetworkEye
has been moved to a new location or maybe somebody has changed a key network
setting.
-
If this is a brand new installation, is it confirmed that the network station
trying to talk to the NetworkEye resides on the same subnet? At
first, the frame server can only be seen on its own subnet until it can
later be told about a default router/gateway.
-
Is there a RARP or BOOTP server running on the network? If so, the frame
server will send out a RARP and BOOTP request by default upon bootup so
even if the network settings have been stored in EEPROM, the device may
gain a new IP address from one of these servers.
-
Has a special event taken place such as a lightning storm or power surge?
If so, did other equipment on the network get affected as well? Is there
anything different about the LED pattern on the front of the device (e.g.
ERR LED comes on) after waiting 30 seconds after a power cycle?
-
Has the NetworkEye been put back to factory default mode by using the appropriate
jumper on the device's board? Sometimes setting things back to square one
and then redoing the network setting configuration helps kick things into
gear.
The Default Image Page Won't Open
Once the NetworkEye can be seen on the IP network, it's time to view the
default image page. However, sometimes the Web browser can't load this
default page. If this happens, be sure to confirm:
-
Is it still possible to communicate with the frame server over the network?
If not, viewing pages stored on the device will be impossible.
-
Has the correct URL been used for this default page? It should be something
like "http://networkeyeIPaddress/image.html" (e.g. "http://192.1.1.1/image.html").
-
Has a network station on the same subnet as the frame server been
attempted? If this is a brand new installation or if a default router/gateway
has not been stored on the frame server, the default image pages will only
be viewable from local stations running Web browsers.
-
If this is not a brand new installation, might there be a TCP access entry
set which restricts certain hosts from communicating with it?
An HTML File Cannot be Put onto the NetworkEye
If creating a special HTML page to view the captured images from the NetworkEye,
this page must be "put" onto the device through an FTP session so Web browsers
can access it. However, sometimes this may fail so these points should
be considered:
-
When the FTP session was opened with the frame server, was a "cd http"
executed to enter the HTTP directory on the device? HTML files must be
placed inside this directory only.
-
Is there enough space on the frame server to accept this HTML file? The
NetworkEye's file system is approximately 63 kilobytes in size and consists
of default files plus any proprietary ones like the one that's trying to
be placed on there now. Therefore, it may be worth checking the size available
for new HTML files by doing a "dir" command once in the HTTP directory
within this FTP session.
-
Is the name of this new HTML file less than 33 printable characters? The
file name size limit on the frame server is 32 bytes.
-
When the FTP session was started with the NetworkEye, were permissions
checked on this HTML file to make sure it could be moved?
If help is still needed, look to "Getting Help with
Microplex Products".


